SNES Gamepad PCB rev2 Fix
Posted on Tue 11 October 2022 in Fixes
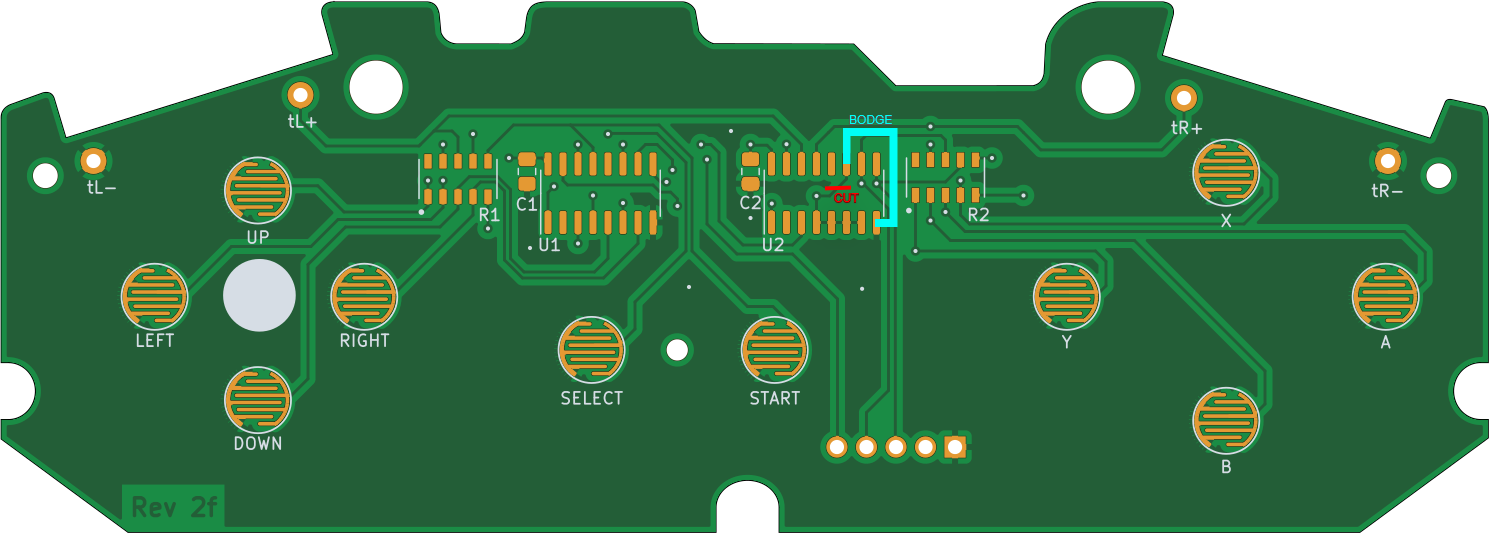
The first public release of my SNES controller replacement PCB had a design flaw that prevented it from being detected correctly by certain games, notably the Donkey Kong Country series. A new revision has been released that addresses this issue, but if you have some of these rev2 boards that you don't want to just toss out, here's how you can bodge in a fix.
Summary
Pin 11 on U2 must be isolated from the pull-up that keeps pins 4-7 high and tied low by connecting to ground instead.
Tools Required
- Soldering Iron
- Hot Air Gun
- Solder
- Wire
- Utility Knife
- Digital Multimeter
Directions
If you installed one of these in your SNES controller, then I won't insult your intelligence by covering how to disassemble the controller and remove the PCB for rework. These steps assume you've done all that and currently have the PCB in a suitable rework environment.
- This is the hard part: the IC at U2 must be removed to access the traces directly under it. This is best done with a hot-air rework station, but any hardware store hot air gun can do the job if enough care is taken.
- Use a utility knife (or any other sharp instrument) to cut the trace as marked between U2 pin 11 and the via.
- Using a meter set to continuity, verify that pin 11 is now isolated (no beep) by testing for continuity between it and:
- U2 pins 4-7
- R1 pin 9
- Solder U2 back in place.
- Solder a wire jumper between U2 pins 8 (ground) and 11.